Ninja 400 Riders Forum banner

EVAP canister removal

1 reading
70K views 123 replies 35 participants last post by  spurscar  
#1 ·
1. Remove the LH side fairing to gain access.

2. Pull the vapor supply line off at the fuel tank end.

3. Unclip the connector for the power supply to the purge valve solenoid:


4. Remove the purge line at the three-way joiner where it splits into two lines before connecting to the throttle bodies:


5. Block off the exposed line with a screw or such like.
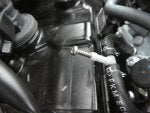


6.Remove the two bolts that attach the canister cradle to the frame.


7. Remove the whole system.
 
#122 · (Edited)
Bumping this thread again because I've seen a few diagrams and photos that aren't really matching my situation.

I was installing the TST frame slider kit and found out I have a California bike apparently..... in South Carolina. Go Figure. Anyway it has the evap canister, lucky me.

When I went to relocate the canister I saw that the second male tube fitting had nothing connected on the sensor as shown in red here (I reused an image from this thread, this isn't mine exactly):
Image


Not sure if that's normal though cause I also had a loose hose with a spring clip on it even. But, the loose hose isn't the simple line out of the fuel tank, it goes back under the fuel tank. Thinking it came loose during dealer installation I just clamped it onto the open male peg of the sensor. No issues with 10 miles of riding thankfully but now I'm thinking that second peg is supposed to be open on that sensor?

Here's what it looks like with that hose disconnected again - this was how it was when I first took off the fairing on a new bike.

Image


Is this correct? The diagram from the service manual isn't making a lot of sense.

Because the service manual seems to say that it should be connected, like this?

Image